Showing posts with label DIY. Show all posts
5 DIY Projects for the Classroom

5 DIY Projects for the Classroom


Hey friends! I'm super-excited to link up with Tara from 4th Grade Frolics for Monday Made It! I have been having a blast this summer with the DIY projects for my new classroom, so I thought I'd share a few (plus a couple of oldies!) If you follow us on Instagram, you've probably seen a few sneak peeks of these. If not... click here so we can be BFFs!


My first two projects were from last summer. I saw the cutest fabric strip table skirt from Marsha at A Differentiated Kindergarten. She has an amazing tutorial that you should check out if you want to do one!

 I started out picking some cute fabrics from Hobby Lobby. These matched well with my newly covered teacher chair (coming up next!)

 I then used fabric scissors and cut the fabric in strips.

The fabric is then tied around a ribbon the length of the table you're covering.

Ta-da! Final product! Again, check out Marsha's tutorial for instructions.

Next up is a project that I blogged about here: my comfy, cozy teacher chair! I've now had this chair for a year, and it has held up perfectly!

Check out the blog post for specifics!


Now onto my current summer projects.
My first project of the summer was a new eraser storage organizer.


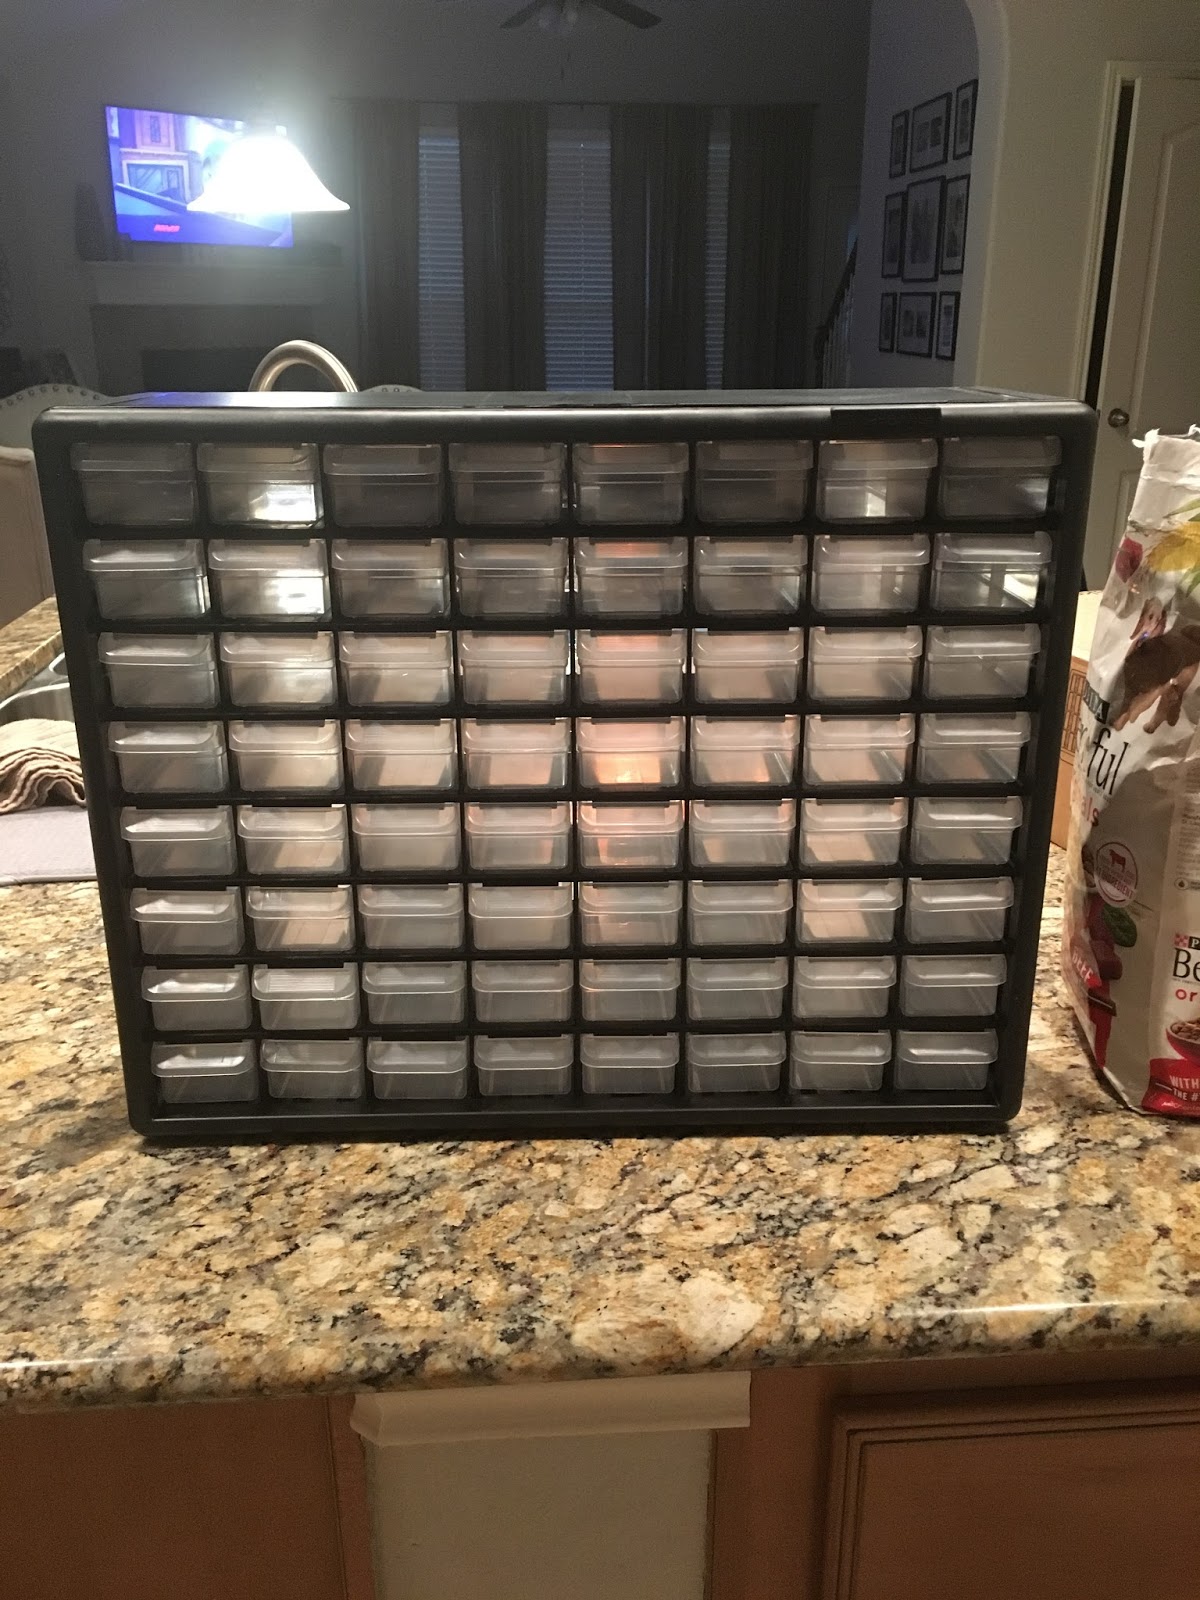
I love everything about Target erasers. It's a problem. My kiddos love using these seasonal erasers as manipulatives with our math centers. I started to realize I had WAY TOO many erasers, so I ordered this toolkit drawer system from Amazon. I sorted the erasers and then hot-glued one eraser on each drawer for easy access.


What I love the most is that I still have room for more erasers! Ha!
You can check out how we use these erasers here.

 I am all about a deal, and when I saw these ikea stools (6) on Craigslist for $20, I jumped on the deal. Of course, I couldn't just leave them the way they were!


A little light sanding, some spray paint from Target, and voila! I used trash bags around the legs to protect the legs from the paint.


Finally, my FAVORITE project so far, my new classroom kindness table.


I started off with an ikea coffee table that I bought off a neighborhood Facebook page for $10.
I knew it would be perfect for a flexible seating option.
I started off by sanding the table and spaying it with primer.


I then painted the sides white and the middle teal. I used Devine Color Spray Paint from Target. You can find them here


Once all the painting was finished, I found a design that I could print with my Silhouette Cameo. I've always loved this quote, so when I saw it, I knew it would be perfect.
 The quote was in the Silhouette Studio Store. It's a digital download. You have to have a Silhouette and the software to access it, but I'm sure you could find something similar on etsy.


And here's the final product. I can't wait to share it with my students! I'm hopeful that this will be a positive reminder for my students each time they sit at this table.


Thanks so much for stopping by! I hope you've found some inspiration. Be sure to head back to 4th Grade Frolics to check out some more Monday Made It blog posts!


Wanna save this forever and ever? Pin this image. :)


Read more »
We Heart Teaching
7 Comments
Monday Made-It: Revamped Teacher's Chair

Monday Made-It: Revamped Teacher's Chair


Hey ya'll!
I'm excited to link up today with 4th Grade Frolics for Monday Made-It!

I've always envied the teachers with those cute teacher chairs in their circle-time area, but I just couldn't bring myself to spend a lot of money on one. After seeing some adorable chairs on instagram, I decided it was time to make my own. I posted a search for a chair in my local area facebook group and quickly came home with this chair for $35. Not bad!

 I then asked my friend, Freddy, if he could help me recover it, and we were ready to go! I headed to Hobby Lobby and found this fabric that I LOVE! (It's actually duck cloth, whatever that means.) I bought 4 yards and that was the perfect amount.

Here are some pics of the process. We did not take off the original fabric. We just covered it. (By we, I mostly mean Freddy.) We weren't able to remove the feet, so that complicated things. We used lots of pleating and folding to get a clean look.


And here's the finished product! I LOVE IT!!


Not an official "made-it," but since we rarely blog, I wanted to share that Ashley and I finally bundled our 1st grade math tubs!! You can find the bundle in my TPT store (Jana Guerra).
https://www.teacherspayteachers.com/Product/1st-Grade-Math-Tub-YEARLY-BUNDLE-2677786

It's currently discounted as part of a #summerSALEbration that we are doing with some TPT friends. We have lots of sales and giveaways planned in the next few days, so search #summerSALEbration on instagram to check it out! (Do you follow us on instagram?? You should!)

That's it for now! head over to 4th Grade Frolics to check out the other Monday Made-Its! :)

Read more »
We Heart Teaching
0 Comments
Monday Made-It (and a FREEBIE!)

Monday Made-It (and a FREEBIE!)


Hi there! I'm linking up with the fab Tara of 4th Grade Frolics for this month's Monday Made It! I have a  few "made-its" that I've been saving up... but it looks like I may have deleted some of the how-to parts. I am CONSTANTLY running out of memory on my stinkin' i-phone, so I guess I got a little carried away with deleting pics to free up space. I'll try and explain as we go.


Looking to add something new to your word work? Kids LOVE anything seasonal. Why not use Halloween erasers (or other manipulatives) on your play-doh mats? For this month, I simply printed my play-doh mats on orange cardstock and replaced our play-doh with these Halloween erasers from the Target Dollar Spot. The kids will love it! Looking for sight word mats? You can grab mine for FREE from my TPT store. (Be sure to leave some feedback while there!) :)

http://www.teacherspayteachers.com/Product/Sight-Word-Play-Doh-Mats-1497519


My kiddos this year are super-talkative, so a few weeks ago I had to pull out the big guns: Quiet Monsters. I had pics of the creation process, but those were deleted. To make these sweeties, I hot-glued googly eyes and foam hearts (the feet) to the little fuzzies. Voila! You have a quiet monster.

These babies arrived mysteriously to our front office with a  letter to my class stating that they'd like to live with us. Sadly, their little ears are super-sensitive, so we have to work quietly. In the mornings, as the kids come in, I pass out a quiet monster to those who are working quietly on their morning journals. If they are not following directions regarding noise level throughout the day, they can lose their quiet monster. Simple, yet effective!


Finally, I just had to show my little chair project! Everyone on my team has these super-cute chairs. I just can't bring myself to spend the money on a chair for my classroom, but I just couldn't take this ugly maroon chair ANYMORE! I found some fabric that I'd used to cover a table a few years ago and went to work. This was the easiest DIY project I've ever done.

For the top, I just pressed the fabric into the back using a flathead screwdriver. This was the hardest part, but a little muscle was all it took. For the bottom, I just pulled the fabric tight and stapled to the bottom. Easy-peasy! This chair is SO.MUCH.BETTER.

That's it for now! Let me know what you think, and head back to 4th Grade Frolics to check out some more made-its!


Read more »
We Heart Teaching
4 Comments