Penguin Paper Mache Tutorial


We've been learning all about penguins these past few weeks. This week, we created paper mache penguins that will be displayed in out hallway during Open House. We had to look all over the internet for instructions on how to do this, so I thought I'd take lots of pics and share how we did it!

First, we had to find the right balloons. We got packs of assorted balloons from Party City and pulled out the skinny balloons. My advice would be to buy one pack and open it to see if it has the correct size that you need. I'm not positive that the link above has the correct size since we purchased our balloons in store. You are looking for the long skinny balloons on the right. (Note: Balloon animal balloons will not work! Way too long and thin.)


We then blew up the balloons and added a rubber band for a neck. I used a pump to blow up the balloons.

Next it was time to mache! We had newspaper prepped and cut into strips. We actually had enough left over from last year because you really don't need a much as you think you do!
 Each child got a paper plate with their class # on it.
We used a half glue/half water mixture and paint brushes.


Tips: I had one parent at each table. They helped keep the paper smooth and ensure they added enough layer (they need 3.) Make sure the kids place the strips around the balloon (not up and down.) This will help keep things smooth. They will likely need to tear their strips in half or thirds. They will need very small pieces for the rounded areas (head and bottom.)


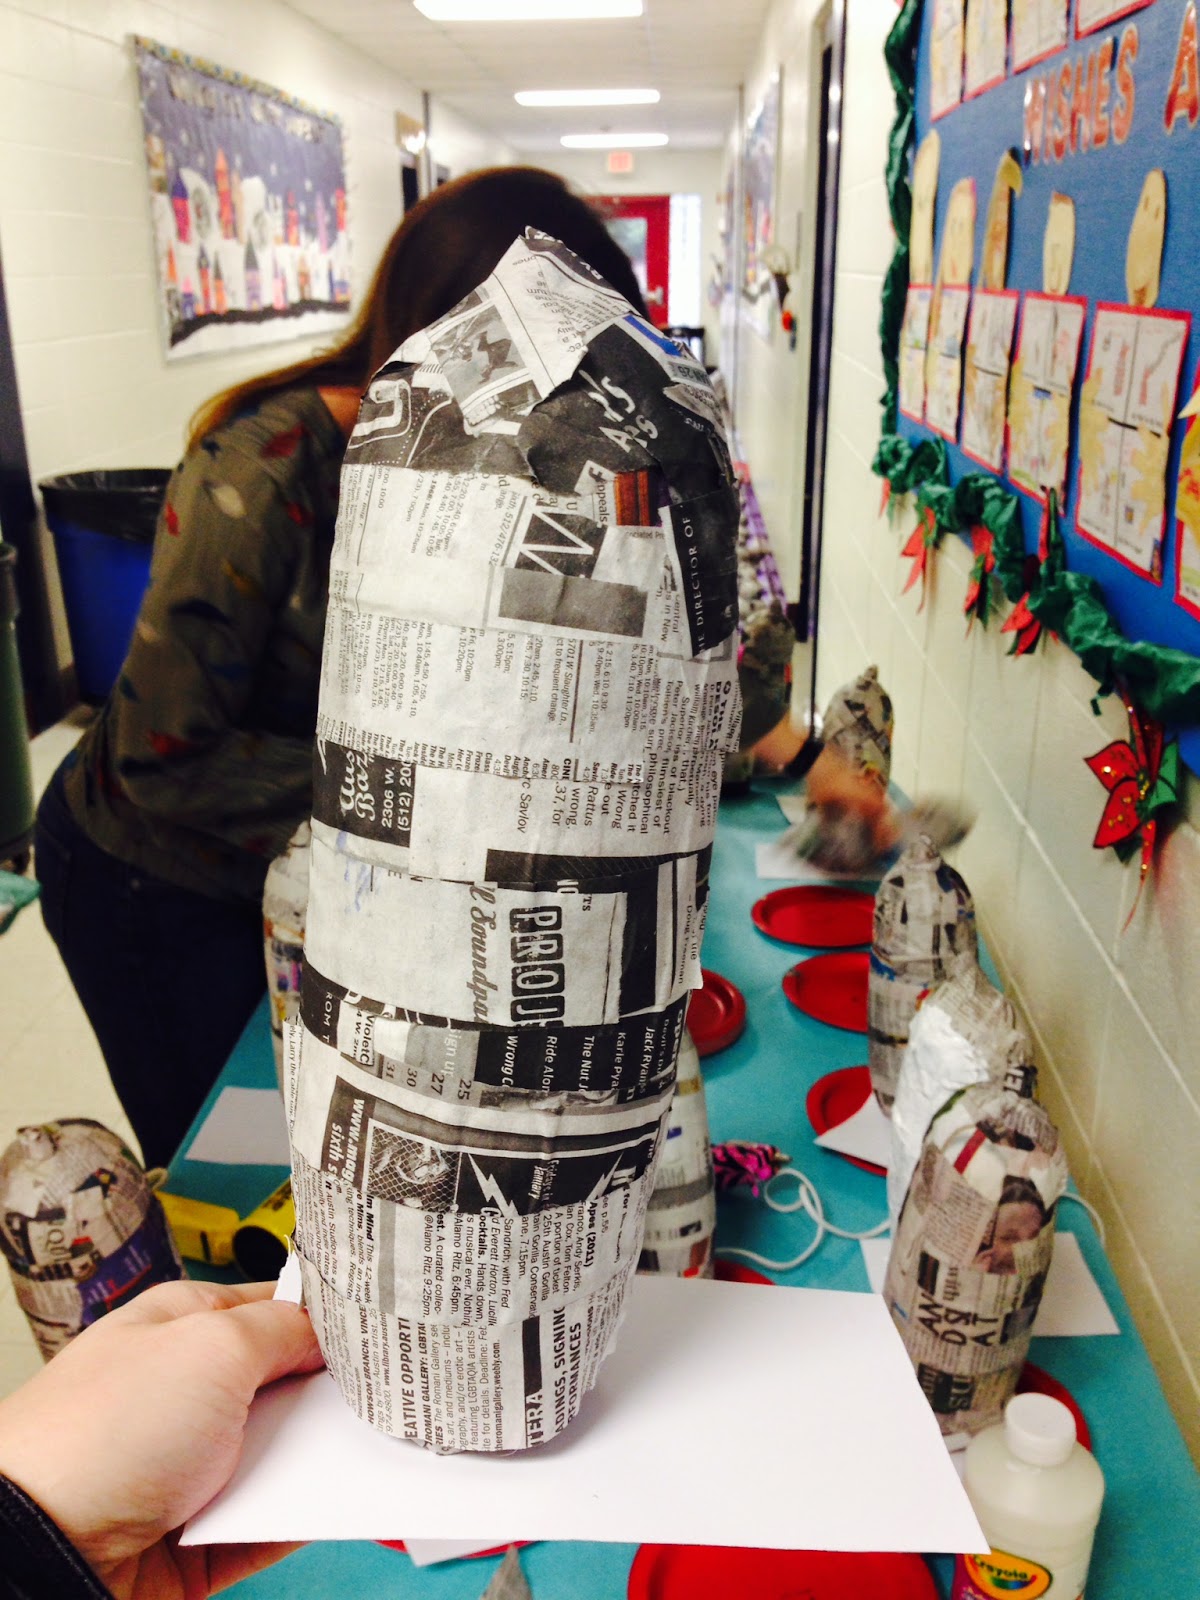
This is ONE layer...and no beak. Adults formed the beaks when everything was finished because this is the hardest part. (The beak is formed around the tip of the balloon.) They REALLY need 3 layers. I have a few cracked heads because some kids did not put enough layers.


Once everyone was finished, we put them in the hallway to dry!


We used a hair dryer to try and speed up the drying process. It helped! Last year we really over-saturated the balloons and some took 3 days to dry!  This year was much better and all were dry by the next morning. I had to use the hair dryer on just a few damp spots on day 2.


On Day 2 morning, I had parents come and pop the balloons and hot-glue bases (white poster board squares) so they could stand up during painting. They also painted the bellies white so the kids would just have to paint around the dry white paint that afternoon. You could easily have kids paint the bellies in the AM and the rest in the PM, or do it all at the same time! I had the help so I used it.


Day 2 afternoon I had parents come in again to help with the painting. We had one adult with each penguin group. This time they were in their penguin groups since we studied 5 different species and they don't all look the same. (Hello, Little Blue!)


Day 3 morning, I had some amazing parents come up and finish things up! They replaced the bases (the others were covered in paint), labeled them, hot-glued the wings, tails and feet, and did some touch up painting where little painted fingers got on white bellies.


 I had the wings, tails and feet pre-cut by fabulous parent volunteers. You could easily have the kids cut these themselves if you don't have many volunteers. I just drew wings and tails and copied them on black cardstock. The feet were just copied on orange construction paper.

This is as far we've gotten at this point. They still need googly eyes and feathers for the Rockhopper and Macaroni penguins. I'll add that on Monday. Here are some pics of the final products from last year. We set the penguins up in colonies in our hallway for our annual open house.


 I think that's everything! If you're interested in studying about the different penguin species, check out my All About Penguins unit in my TPT store. Not only have we paper-mache'd penguins, we've also researched them and created keynote and pic collage presentations!


 Have a great weekend!

QuickEdit
We Heart Teaching
0 Comments
Share :

Guided Math Update


Happy Tuesday, everyone! Today was our first day back with kiddos, and it was a great day! I felt well-rested and well-planned...a perfect combo! I've had lots of questions about our guided math routine lately, so I snapped a bunch of pics today to share with you.
(I have no idea why these first 2 pics are wonky, but I can't fix  them!)
I first want to say that I TOTALLY slacked off on math groups during December. Things were just too crazy, I was exhausted from my first trimester, and we mostly did whole group lessons. I know... I know. Today when I told the kids we were getting back into our routine- they were so happy! I felt bad!

Anywho, I'm just going to go from beginning to end.
We do math right after lunch. As soon as we come in, the kids get their weekly 5-a-Day Math from their busy bee folders and get to work. This takes about 5 minutes.


This is our "warm-up." The 5-a-days spiral and review skills previously taught. It also repeats the same skills for 3 weeks at a time, so they are very independent before moving on to something new. I cannot tell you how much this has helped my firsties solidify their math skills. I am always so impressed when we do math tests!

After the 5-a-day, the kids come to the rug. Someone usually starts the Quiet Game while we're waiting for our friends to all finish. This is my teacher table at the front where I have all of materials prepped for the math lesson.

Once all friends are accounted for, I show an interactive video from our math curriculum. We use Pearson Envision. While I'm still not quite used to the curriculum, I do like these videos! They are short and really cover the topic of the day. I've also shown my focus board with our current "I Can" statements. This week were are working on adding 3 numbers.

After the video, we go back to our seats to complete the workbook page from our curriculum. I originally thought that this would be our independent practice, but we quickly discovered that the pages were overwhelming and confusing for the kids. (Let's just say...I'm not a fan.) We do most of this whole group, and I walk around and check while they are working independently. It's about 10 minutes tops. While we are not required to use the workbook, they will very likely use them in upper grades, and we want the kids to be familiar with the format and expectations.

Now that the mini-lesson is complete, it's time for some fun! I use the smartboard to rotate the groups. I always start with my lowest group at the teacher table and my highest group at "paper practice." This is because the more advanced group can usually function independently, and my lower math students can get the extra practice before working independently. This has worked perfectly thus far.
 
Today, in my group, we used a math game to practice our skill of the day. This game comes from my January Math Centers. Tomorrow I'll add it to our math tubs! The teacher table group always looks different depending on the skill. I do love when I can play a game with them, though!

We took turns finding the parts to build our snowmen. Once he was built, they took turns solving the equation. I had plans for my advanced group to do something different, but by the time I got to them, they were too excited for the snowman game!

After teacher table, students move to math journals. I try to always make this an extension of what we've done that day in groups. I literally create these a day or so ahead of time or pull them from my math centers. The activity on the right is part of the snowman game in  my math center bundle.

If students finish their paper practice activity, they are able to move to technology. We have ipads, so they are able to do an ipad math app or a QR scavenger hunt if available.
(This is a pic from last year.)


After math journals, we move to Math Tubs. This is a fave, but they must finish their paper practice or they have to finish during math tubs.
  

These are also from my January Math Tubs. We ordered the little foam snowflakes from Oriental Trade, and the adorable penguins were my son's. I almost threw them away!!

A few notes: between each round, students come back to the rug and we rotate the circles. I release them group by group. This seems to work much better than just rotating between rounds-less chaotic!

Alright, ya'll. Sorry if this is jumbled. I'm tired!! I hope you find this helpful. What do you think of guided math? Let us know! Thanks for stopping by!


QuickEdit
We Heart Teaching
0 Comments
Share :

The Post-Winter Break Blues: Back to School and Penguin Timel!


It's that time again, friends. Tomorrow we head back to school. I'm very fortunate to have a work day tomorrow. I'm super-excited to get in there and get organized!

I spent a little time at school  this past week because I (of course) decided to COMPLETELY rearrange my classroom. I really felt like the "feng shui" was off in there or something. I know absolutely nothing about feng shui, but I felt like it wasn't a calming atmosphere. Hopefully the new set up will be better. I plan to share pics of that very soon!

While there, I had some time to get a few things together for the next couple of weeks, and I thought I'd share a little about what we're doing!

We'll be starting our math time with a little 5-a-Day review. I recently edited the last few weeks of my semester one 5-a-days so that we could start the year off with some review rather than new topics. (That is the point of it!) 
For some reason, I still have a few weeks left from the semester one pack, so we'll finish those up before starting the newest set. These have helped my little firsties tremendously!

I'll also be introducing new math tubs. This is their favorite part of our guided math time, so I can't wait to get going with these new games and activities.
Can't wait to get these laminated tomorrow! They're from my new January Math Tubs bundle.

In language arts we'll be working on the vowel team ee. I cannot believe we're already there, but we are! That's exciting though because I'll get to pull out my Word Work Vowel Team bundle!! FINALLY! Something I created LAST YEAR that I don't have to edit for this year! You can check out more about our word work routine by checking out my previous post: Word Work Made Easy!
http://www.teacherspayteachers.com/Product/Word-Work-BUNDLE-Vowel-Teams-Digraphs-Diphthongs-1234122

The ABSOLUTE best part of January for me is starting my penguin unit. I cannot wait! Do you study penguins? I just can't get enough of those quirky birds! Our whole team does the penguin unit and we turn our hallway into a penguin colony for Open House.


I'll do a how-to on these papier-mache penguins soon! Each child chooses a penguin species to research, and they create a keynote presentation on their ipads.

 In order to make the research a little easier, I created QR codes with required info for their data collection sheets. Once they had the required info, they could continue their research using books, websites, etc. If you don't have ipads, they could use the facts task cards and easily make posters, books, etc. This is all included in my All About Penguins unit.

http://www.teacherspayteachers.com/Product/All-About-Penguins-A-Non-Fiction-Unit-1118526

While at school, I also updated my book display!! LOVE.
What books do you enjoy reading in January?

Finally, you may have noticed that I haven't blogged in...a while. I had a good reason though! We shared this news with family and friends over the winter break.

I've pretty much been sick and tired for the past 3 months, but I'm finally starting to feel better and plan to do a much better job with this little blog. Thanks for checking in! Check out my TPT store to find out more info on the products below.

http://www.teacherspayteachers.com/Product/All-About-Penguins-A-Non-Fiction-Unit-1118526     http://www.teacherspayteachers.com/Product/Baby-Its-Cold-Outside-January-Winter-themed-Math-Tubs-1625956


         http://www.teacherspayteachers.com/Product/Word-Work-BUNDLE-Vowel-Teams-Digraphs-Diphthongs-1234122


QuickEdit
We Heart Teaching
0 Comments
Share :